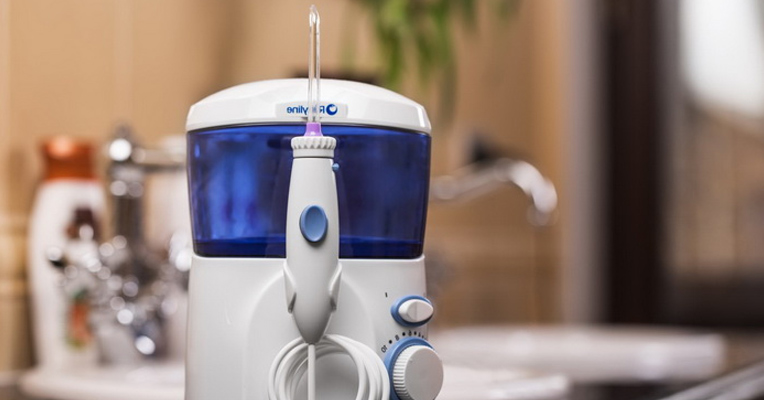
While water flossers are a must-have dental tool for keeping your teeth and gums clean, you have to know exactly how to wield them for maximum efficiency as you would with any other instrument and floss type. We do have a tip or two (or ten!) on how to best take advantage of your oral irrigator capabilities. These instructions are intended to be universal, fitting both travel and regular models.
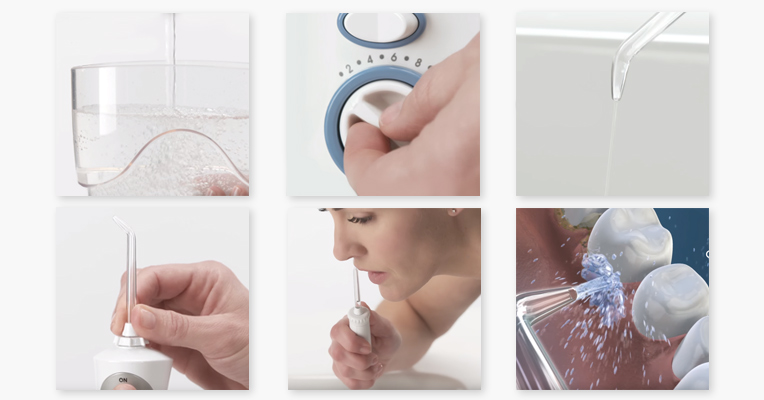
1. First things first, fill up your dental tool’s reservoir before you floss. Use warm to tepid water but never settle for hot or cold as gums can be very sensitive to temperatures. If you’ve got a regular model, the container is likely large enough to store enough water for several cleanings while the portable travel irrigators have to be refilled before every use. Make sure you have enough water in the reservoir to finish the floss process in one go.
2. Take a moment to adjust settings on the floss tool. Check the water pressure, see if you’ve got the right tip on, set the speed, and test out the device to make sure the water flows well. Don’t point it anyplace that you wouldn’t want to get wet, of course, simply aim it down the sink instead. While we’re on the subject of the tip and speed choices: consult your dental professional and ask them which setting would work best for you as plaque build-up has to be dealt with but overly sensitive gums won’t respond well to a stream of water blasting them.
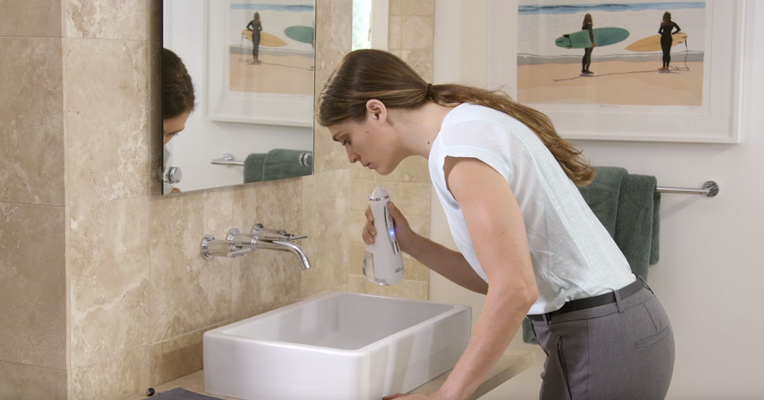
3. Choose a comfortable position that will leave your head directly over the sink as there’s bound to be some splashback while you floss and you don’t want water all over the floor. We recommend bending down a bit to make sure no water leaks over the edge of the sink.
4. Put the tip of the device in your mouth but don’t press it too hard into your gums, simply position it against them. Double-check to make sure the speed is initially set to the lowest possible as it might not knock out a tooth but an excessively strong stream might take you by surprise and make you drop the oral irrigator.
5. Close your lips around the tip of the floss device and, after pointing it at your teeth, turn the irrigator on. Once the water starts flowing, open your lips just a bit and make sure that any excess liquid flows down directly into the sink.
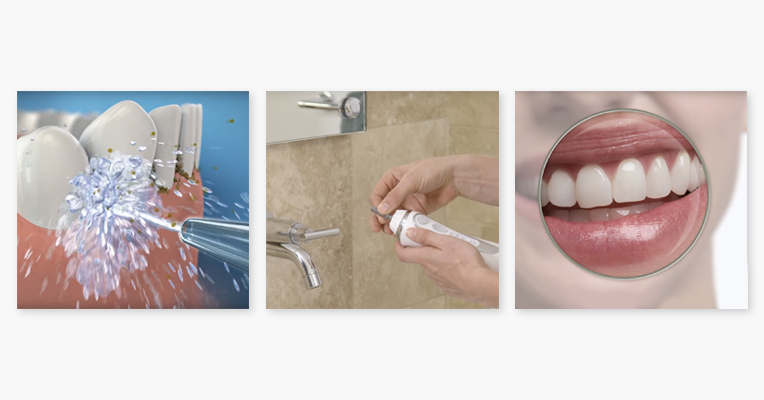
6. Slowly move the tip of your Waterpik floss tool along your gums, pausing on every couple of teeth to let the water clean them off. If needed, increase the speed and water pressure.
7. Take at least 2 to 3 minutes to floss, rushing isn’t going to do you any good and whatever seconds you may save on the process aren’t worth the dental issues that would arise later. Speaking of which, be methodical once you’re done as well.
8. After finishing your flossing, spit out the remainder of the water and eject the tip out of the irrigator. We recommend cleaning it right away as leaving it for later will only let the debris that could have stuck to the dental device dry out and cling harder. Don’t forget to rinse out the tip with hot water as well.
9. Drain the reservoir of the remaining water, especially if you’ve got a portable model that you’re planning to pack away. This is a must to prevent leaks as well as ensure that the water you’ll be using next time doesn’t get contaminated with anything.
10. Use your Waterpik water flossers daily, no matter how tired you are or how much you’ve got on your plate. Only regular use will bring visible benefits and protect every tooth and gums from poor hygiene.
As we’ve said, it’s best to use your Waterpik floss device while leaning over a sink to make sure the water doesn’t spill on the floor. But not everybody is going to like having to bend over the sink and it’s not mandatory as long as you’re careful. Just make sure to keep your lips pursed tight while letting the irrigator floss, only opening them a smidge to let the water trickle out into the sink. Under no circumstances should you open your lips, even if you’ve got your face halfway into the sink, as the irrigator will splash its way out of your mouth and end up spilling water all over the bathroom. Speaking of which, try to keep water pressure low to make the splashes a bit more manageable. And do consider leaning right over the sink during your first few dental procedures at home. Once you’re used to the device, go ahead and experiment to find a comfortable position that will also let you prevent messes.
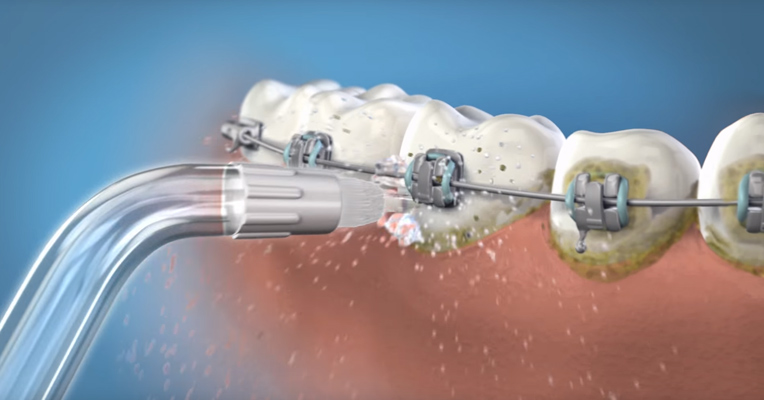
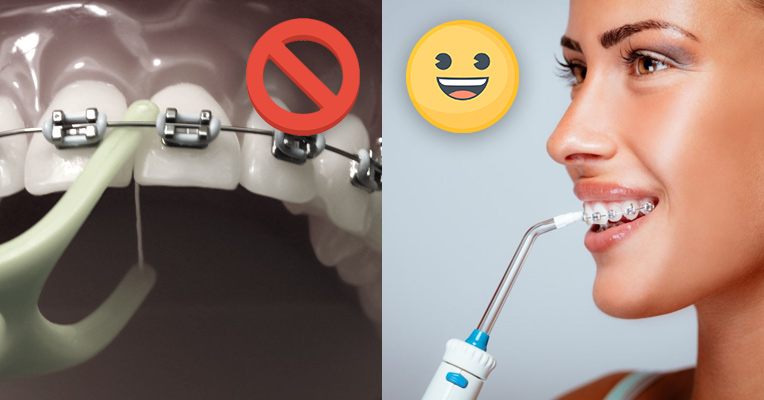
Although it may seem dangerous to use a water-based dental device while you literally have a bunch of metal on every single tooth in your mouth, the Waterpik irrigators are completely safe to use with braces. After all, you can still drink water while you have braces on, right? Well, then the Waterpik floss tool is no different! In fact, it may be your only option if you want to floss as using a regular thread is impossible due to braces getting in the way. In fact, most water flossers actually come with a special tip that uses a little brush to clean off the braces as well. So don’t worry and keep using your Waterpik as you would regularly.
How Often You Should Use Your Waterpik
As with most dental procedures done at home, dentists recommend using the water floss devices once per day. While you can use it twice a day, pairing the floss tool with your regular brushing (you do brush twice a day, right?) but there’s no scientific conclusion on whether this has any tangible benefits yet. Once a day should be sufficient as long as you floss properly.
One question that seems to concern both regular people and dental professionals alike is which type of floss works best. Can we really say that a Waterpik water flosser is as effective as the good old thread? Well, some research has been done and while new evidence is still being discovered, there are some interesting findings.
For example, there’s a whole paper based on researching the water floss method and studying how relevant it is for most patients. While it does mention that the water floss devices have their shortcomings, the study concludes that the Waterpik dental tools are highly useful for some types of users and surpass regular floss thread in terms of cleaning quality.
If you’ve got plaque as your main dental issue, you might find this evaluation highly interesting as it does actually prove that regular brushing and using water floss are much more effective than using thread.
In addition to that, the Waterpik water floss tools are more useful for people with braces as they actually can’t use thread at all. Plus, those with sensitive gums often end up bleeding after using the floss thread while the dental water-flossing devices seem to elicit no such response even in the inflamed gums. There are even cases where otherwise healthy gums were left bleeding after a person used the floss thread a bit too intensively. All in all, the Waterpik water floss is just a safer way to do things compared to a regular thread.
All things considered, it does seem like the question should be shifting from “is my Waterpik as good as a regular thread?” to “is a regular thread as good as the Waterpik water floss?” because, as is often the case, technology seems to win over simplicity. We do have to admit that the thread is a cheaper option and requires no maintenance but a few extra bucks per year and a few minutes spent on cleaning your Waterpik are more than worth it to have a healthy mouth where every tooth is shining white and the gums aren’t bleeding or overly sensitive.
